This is a guest blog post by Belle Mutchler
How to setup wireless internet – Setting up a wireless network in your home allows you to connect and share internet access and other data among computers. Users on the home network can enjoy the various features and amenities on the internet after the wireless router has been installed. The setup procedure is uncomplicated so you can gain internet access within minutes of setup. However before attempting to set up, you will need to ensure that you have:
- An operating system that supports wireless networking – Windows 7, Windows Vista, Windows XP
- A broadband (DSL or Cable) internet connection – this is provided by an Internet Service Provider (ISP)
- A wireless router or DSL modem (also provided by the ISP)
- A computer with built-in wireless network adapter
- A copy of your router setup instructions
When you have acquired all the necessary tools then you can proceed with setup.
How to Setup Wireless Internet
Step One-Connect to Internet
Ensure that your Internet connection and your cable modem are working. If these are out of order, it will affect your wireless network.
Step Two-Connect your wireless router
This is where you connect your wireless router to your cable modem. Ensure that you have a hard copy of the instructions for network connection provided by the ISP. When you have the instructions in hand, turn off your cable modem and your computer. Connect your wireless router to your modem. Please note that your modem should be directly connected to the internet since this is the channel in which the wireless router will work through after setup.
How to Setup Wireless Internet – Locate the network cable which is plugged in at the back of your computer. Unplug it and plug it in one of the four Local Area Network (LAN) ports on your router. The other end of the cable should be plugged in to your computer. Turn on your modem and your wireless router and wait to see the status lights blinking on your router. This is clear indication that the router has successfully connected to the modem. It should not take more than a minute.
Step Three-Configure your wireless router
Proceed with your setup by turning on your computer. The computer should be automatically connected to the router. Once your computer has start up, open Internet Explorer. You will be directed to the router’s configuration page.
On the configuration page you will be required to create:
- A wireless network name (SSID)
- A network security key which is encrypted so that only computers on the wireless network will have access to the internet and data being shared.
- Your administrative password which controls your wireless network
After creating these, click “Save Settings“ “Apply” and “Ok.”
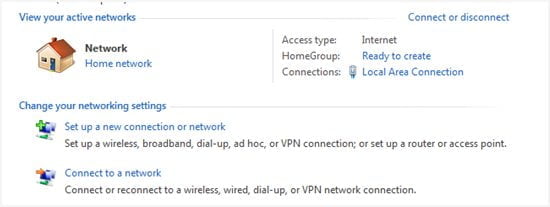
Your wireless network is now ready for usage. To add other computers to the network, go to the small menu at the bottom right hand side of the desktop. If the computer has a built-in wireless adapter, you will see the internet icon in the menu. If not, the computer user can consult the ISP to source a wireless network adapter most suitable for the computer in order to access wireless internet. Click the icon and connect to your network. You will be required to type in the password and then press “Enter.”
Now all the residents of your household can enjoy wireless internet!
Note: This is a guest blog post by Belle Mutchler who blogs about linksys router and linksys password


Comments are closed.