 There are so many ways to take a screenshot in Windows and there are so many applications out there trying to make the task easier: SnagIt, Screenshot Pilot, ScreenGrab for Firefox, and don’t forget the old traditional way of pressing the Print Screen (PrtScn) button. Recently I was given a chance to try WinSnap from NTWind Software.
WinSnap is an application to take screenshots & edit them easily. Okay, so we’ve heard that every screen capture application claims to have superiority compared to other screenshot applications. So what’s make WinSnap better than the others?
How to take a screenshot with WinSnap
WinSnap interface is plain simple. To take a screenshot, select the type of screenshot you want to do: Full screen, Application, Window, Object, or Region.
Then, click on the “New Snapshot” button to take the screenshot.
Once completed, you will see the screenshot on WinSnap main window. To add effects, simply tick on the effects that you’d like to be applied to your screenshot.
To modify the default settings of the effects, just click on the image or do it through WinSnap Options menu.
WinSnap also sits nicely on your system tray when minimized, so you can always grab a screenshot easily every time.
and you can also do a right click on the tray icon to access WinSnap main functions:
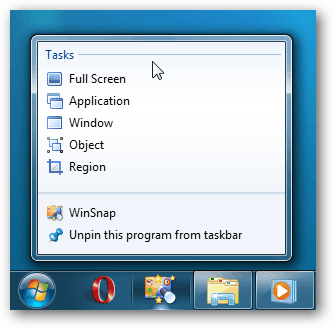
Feel free to check out the other official WinSnap application screenshots.
WinSnap Features
- Take screenshots on non-rectangular and transparent Windows
Most Application windows are round-edges and not in perfect squares. Using other applications, you may have to do an extra editing to remove unwanted background. WinSnap can take any kind of Window’s edge without any problems.

- Multiple Capture options: Full Screen, Application, Window, Object, and Region.
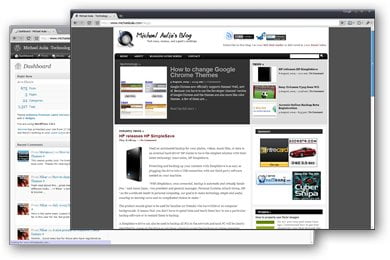
- Capture multiple Windows and combine them in 1 single screenshot.
Use the “Object” WinSnap capture, hold the CTRL button, click on the windows you want to be included, and WinSnap will combine them into a single nice screenshot. Previously I have to import multiple images to my image editing tool to combine them into 1 file (maybe you have experienced this too).
- Add Watermark with a click of a button.
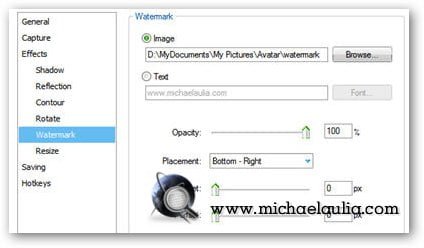
You can add & save your watermark to be embedded on the screenshot easily with WinSnap. The watermark can be a pure text or an image of your choice. You can change the opacity and also the location of the watermark to appear on the screenshot.
Below is the screenshot of WinSnap’s Watermark option with my own watermark embedded on the screenshot:
- Easily add elegant effects on your screenshots.
I said “elegant” because WinSnap only provides the “only-what-you-need” and most elegant effects needed to beautify your screenshots such as Shadow, Reflection, Contour, Rotate, Watermark, and Resize.
You can tweak and save the Effects’ settings easily on the options.To add a particular effect, simply tick on the checkbox next to your screenshot and the setting will be applied automatically. I love how WinSnap makes everything so simple and instant, especially if you are going to do this every day (I plan to publish a post to this blog everyday so I need to take & manage screenshots daily).
- Can be used to edit images as well.
WinSnap is not just a screenshot capture tool. You can also use WinSnap to edit your current screenshots/images and apply these effects easily. - Supports running an external application to automate some tedious process. For example, check Tim Heuer’s blog post on how to automatically upload your screenshots to Flickr with WinSnap.
- Full support for both Windows Vista and Windows 7.

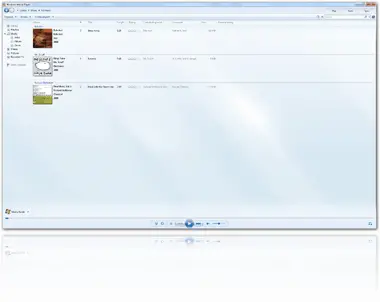
Plus the “Clear Window Background” feature (works for both maximized as well as non maximized):
WinSnap WishList
Even though WinSnap makes my screenshot-taking-life easy, it does have a few shortcomings, such as:
- You can’t drag and drop an image file to the WinSnap application window to edit it. You must open it through WinSnap menu bar.
- There is no crop feature although you can technically re-take a screenshot instead of cropping it :)
- I wish I can resize the watermark image from the WinSnap interface instead of choosing a different image file with a bigger size.
- I wish it has a pen or marking tool as I like to circle of an area on my screenshots to illustrate my point.
- I wish it is free :)
WinSnap Review Conclusion
So yeah, unfortunately, WinSnap is not a free application as the Personal License will cost you $24.90 (however, SnagIt’s license actually costs you $49.95 per PC). On another plus side compared to SnagIt, all WinSnap future upgrades (major or minor) are free once you purchase a license. With SnagIt, you have to pay for another fee on every new major release (from v8 to v9).
Although there are free screenshot-taking applications out there, WinSnap’s quick & easy to use interface gives the nicest features. SnagIt gives me more options and more effects to play with, but I don’t find them useful to what I want to do. If you really have the time, you can practically use GIMP (or any other free image editing tool) to take a screenshot and modify it to your needs. Do this every day though, you’ll get bored real fast as it’ll get tedious every single day.
WinSnap also captures round-edged windows (or any non-rectangular Windows) which is a plus, especially if you like to do Software reviews like I do. At times, they don’t always sit nicely inside a rectangular box and it can be a pain to capture them nicely. Not to mention how easy it is to take multiple windows at the same time and collate them into a single image file.
If you take screenshots everyday (for blogging or for your own website), WinSnap can increase your productivity and let you focus on taking screenshots & writing good contents. I’ve been using WinSnap for a couple of weeks now instead of SnagIt and I wouldn’t want to look back.







Comments are closed.