How to add your blog to CloudFlare – CloudFlare is a great free CDN (Content Delivery Network) service that can speed up your blog significantly (Read my 7 reasons on why you should be using CloudFlare post). What I haven’t explained in that post however, is how to add your blog/site to CloudFlare.
This is a step-by-step tutorial on how to add your blog to CloudFlare easily, for those who don’t understand much about DNS or the technical aspects of it.
How to add your blog to CloudFlare if your blog is hosted at HostGator

If you host your blog at HostGator like Craving Tech (good on you!), you can just login to your cPanel, find the CloudFlare mini icon, and activate the service from there. Press the button – activates. Press it again – deactivates. Too easy, right?
What if your blog is hosted somewhere else? Then you need to do a few manual steps, unfortunately.
How to add your blog to CloudFlare manually
- Go to CloudFlare and add your blog’s URL there (enter the URL), then click next.
- CloudFlare will identify your DNS settings, just wait until it finishes, then continue to Step 2.
- On the “Check Your Missing DNS Records” screen, you can simply continue to the next screen as CloudFlare grabs the information about your domain. Or if you understand about these stuffs, you can double check to see that everything is correct.
- You should see a colored cloud in orange next to your blog’s URL and also on the “WWW” section at the bottom. Continue to the next screen.
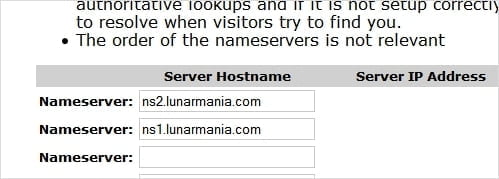
- CloudFlare will give you two new “name servers” settings. This is the hard part. If you registered the domain yourself and been given an access to change your domain name settings, then you need to login and change the name servers. Currently, your blog’s URL is pointed to your web host servers. We need to change them to point to CloudFlare’s.

If you don’t have an access to your domain or if you are a bit confused here, you should be able to email your web host support team and ask them to update the name servers of your domain name into the ones CloudFlare asked you to.
- If you can’t finish this step yet, don’t worry, you can close the browser and continue where you left off.
- After your web host support team (or yourself) update the nameservers, it’s done (you may have to wait a bit to get everything completed)! Enjoy the speed and everything.You may have to wait up to 24 hours
 When completed, you should see a green tick next to your blog’s URL
- Don’t forget to have a look at some CloudFlare settings later on and change them according to your needs. I may have to put up a different post to explain which CloudFlare settings you should pick and why.
For now, please check CloudFlare’s official starting tips.
I can totally vouch for CloudFlare as I’ve been using their service at Craving Tech for many months and as you can see, the blog’s loading speed flies even on a shared hosting account with 3,500 visitors a day (at the time this post was written).
Is your blog powered by CloudFlare too?


 When completed, you should see a green tick next to your blog’s URL


Comments are closed.