Note: This is a guest post written by Jeeva Shanmugam – A USB port is a crucial component of a computer that enables users to connect different devices like external hard drives, smartphones, and printers to their Windows PC. However, sometimes USB ports may stop working due to various reasons, such as hardware issues, outdated drivers, and system errors.
When this happens, it can be frustrating and limit your ability to use your computer fully. In this article, we will discuss what you can do if your USB port stops working on your Windows PC.
Steps to Take if your USB Ports Stop Working
1. Check for Physical Damage
The first step is to check for physical damage. If your USB port is damaged or bent, it may not be able to make a proper connection with your device. Inspect the USB port and look for any signs of damage. If you find any, you may need to take your device to a service center or replace the USB port.
2. Restart Your Computer
Sometimes, restarting your computer can solve the problem. This is because when you restart your computer, it clears the cache and refreshes the system. This can help fix any issues that may be causing your USB ports to stop working.
3. Update Your USB Drivers
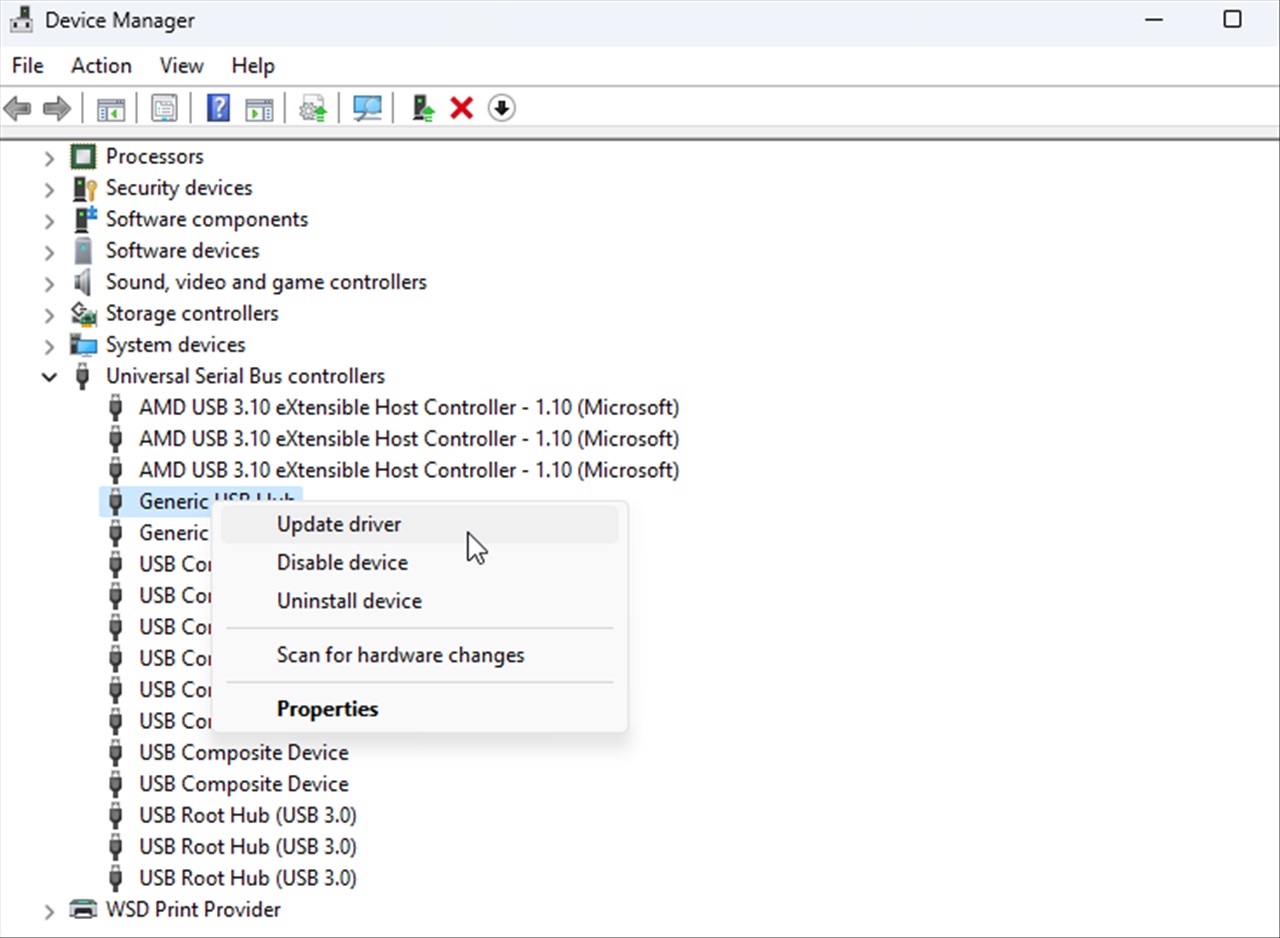
Outdated USB drivers can cause your USB ports to stop working. To update your USB drivers, follow these steps:
- Open the Device Manager by pressing the Windows + X keys and then clicking on Device Manager.
- Expand the “Universal Serial Bus Controllers” category.
- Right-click on the USB driver you want to update and click on “Update driver.”
- Choose “Search automatically for updated driver software.”
- Follow the instructions to update the driver.
4. Disable USB Selective Suspend
Windows has a feature called USB Selective Suspend that allows the operating system to turn off USB devices when they’re not in use. However, this feature can sometimes cause issues with USB ports. To disable USB Selective Suspend, follow these steps:
- Open the Power Options by pressing the Windows + X keys and then clicking on Power Options.
- Click on “Change plan settings” for your current power plan.
- Click on “Change advanced power settings.”
- Expand the “USB settings” category and then expand the “USB selective suspend setting.”
- Change the setting to “Disabled.“
5. Check for Viruses
Viruses can cause all sorts of problems with your computer, including issues with your USB ports. To check for viruses, run a full system scan using your anti-virus software. If your anti-virus software detects any viruses, follow the instructions to remove them.
6. Perform a System Restore
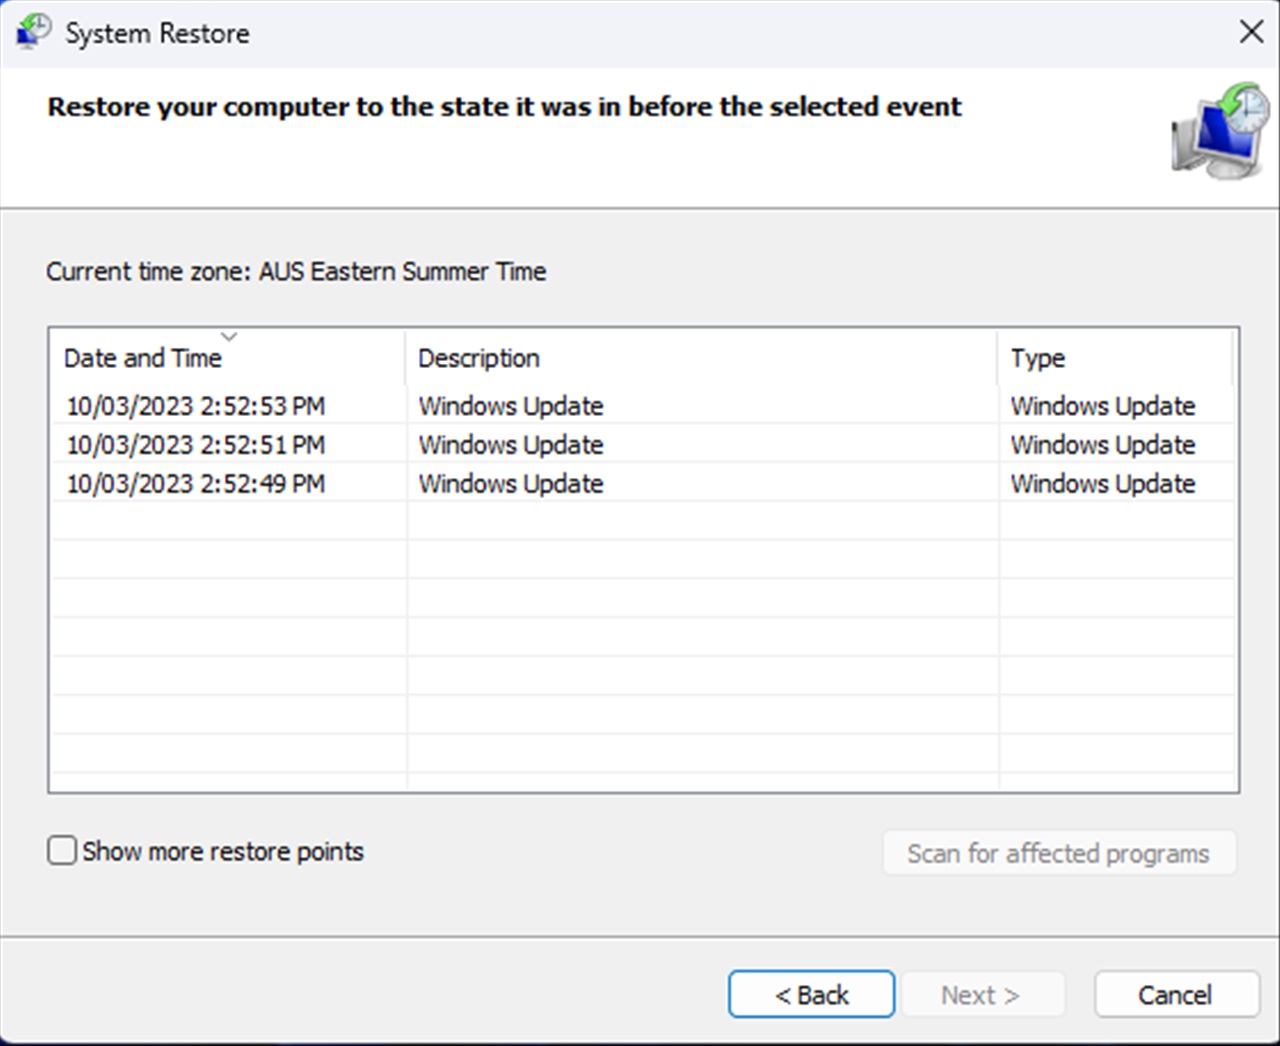
If none of the above solutions work, you can try performing a system restore. This will restore your computer to a previous point in time when your USB ports were working correctly. To perform a system restore, follow these steps:
- Press the Windows key and type “System Restore” in the search bar.
- Click on “Create a restore point.”
- Click on “System Restore.”
- Choose a restore point that’s before the time when your USB ports stopped working.
- Follow the instructions to perform the system restore.
7. Reinstall USB Controllers
If your USB ports are still not working, you may need to reinstall the USB controllers. To do this, follow these steps:
- Open the Device Manager by pressing the Windows + X keys and then clicking on Device Manager
- Expand the “Universal Serial Bus Controllers” category
- Right-click on each USB controller and select “Uninstall device.”
- Restart your computer.
- Windows will automatically reinstall the USB controllers.
8. Run Hardware and Device Troubleshooter
Windows has built-in troubleshooting tools that can help diagnose and fix common hardware issues. To run the hardware and device troubleshooter, follow the steps below:
- Open the Control Panel.
- Click on “Troubleshooting.”
- Click on “Hardware and Sound.”
- Click on “Hardware and Devices” and follow the prompts.
9. Check Your BIOS Settings
If none of the above steps fix the problem, the issue may be related to your computer’s BIOS settings. The BIOS (Basic Input/Output System) is firmware that controls the basic functions of your computer’s hardware. If the USB settings in the BIOS are incorrect, it can cause USB ports to stop working.
To check your BIOS settings, follow these steps:
- Restart your computer
- During the boot process, press the key to enter your computer’s BIOS settings (usually F2, Del, or Esc)
- Navigate to the USB settings or USB configuration section
- Make sure that USB is enabled and that USB Legacy.
Wrapping it All
USB ports are an essential part of our daily lives, and when they stop working, it can be frustrating. However, there are several steps you can take to fix the issue. First, check the connections and ensure that the port is clean.
If that doesn’t work, restart your computer and check the device manager for any error messages. Update the USB driver, disable power management, and check the BIOS settings if necessary. By following these steps, you can fix most USB port issues and get back to using your devices as usual.