Note: This is a guest post written by Jeeva Shanmugam – How to backup a Windows 11 PC? How to do a restore? As our reliance on digital devices and the data they contain grows, it is more crucial than ever to make sure that our information is backed up and is simple to restore in the event of a system failure, device damage, or unintentional loss.
Luckily, Windows 11’s built-in tools and capabilities make it simple to back up and restore files. This post will examine some of the top techniques for backing up and restoring your information in Windows 11.
Back-up and restore your files in Windows 11
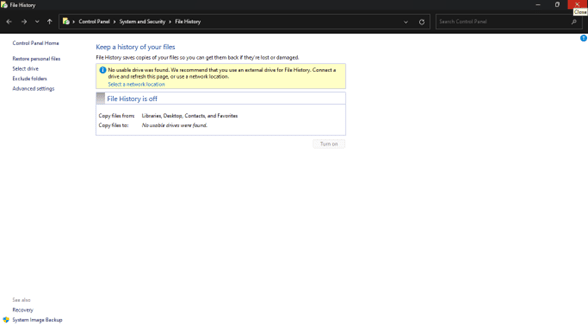
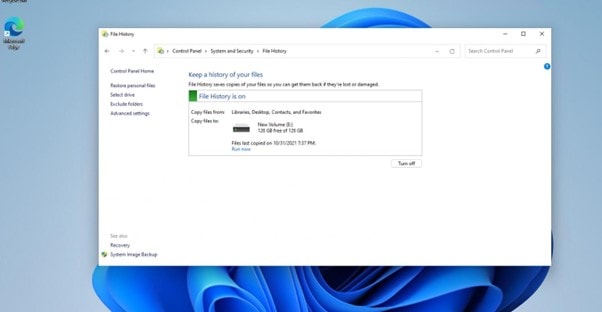
Before getting into the steps, I hope you are aware of the file history option in Windows 11 if not. With the help of File History users can back their files and folders automatically in Windows. It functions by routinely making a duplicate of the data and putting them on a network drive, an external hard drive, or a cloud storage service.
When File History is on, it continuously checks the chosen directories for changes, and if any, it will immediately back up any modified files. This implies that by utilizing File History, you may quickly restore a file to an earlier version if you unintentionally delete or edit it.
Together with the ability to exclude specific folders and files from the backup process, File History also lets users tailor the frequency and length of backups. All things considered, it’s a helpful tool for safeguarding your crucial data and making sure you always have a backup copy on hand in case of data loss.
File History is quite easy to set up and use in Windows 10; it is more challenging to locate and enable in Windows 11. One drawback of Windows 11’s File History feature is that it only backsup certain folders, including Documents, Music, Photographs, Videos, and Desktop, as well as any offline OneDrive items kept on your computer. Like with earlier versions of Windows, you cannot add other folders to the mix.
Microsoft advises adding any data you need to backup that are not already part of the Windows 11 mix to one of the preset folders. If it isn’t feasible, you should think about using a different backup application from File History that offers more features and flexibility.
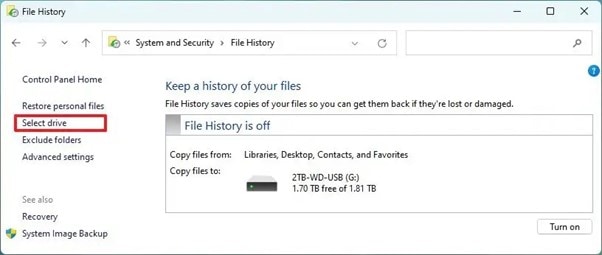
How to set up File History in Windows 11?
To set up File History in Windows 11, you can follow these steps:
[1] Connect an external hard drive or USB drive to your computer.
[2] Go to Settings
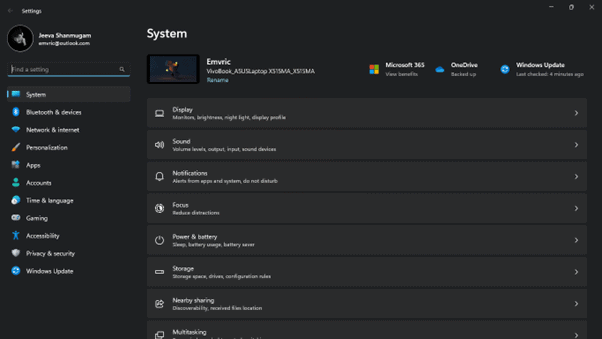
- In the search option Enter, “File History”
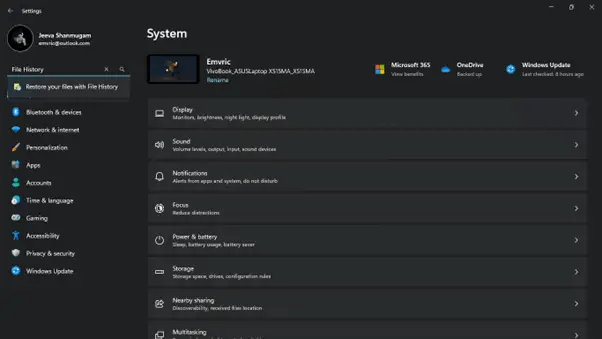
- Click on the “Configure File History” button. Since I don’t have any files to configure I’m unable to add a drive to my PC. Sorry for the trouble.
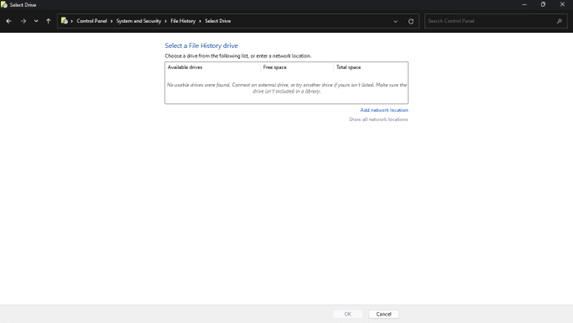
- In the File History settings window, click on the “Add a drive” button to select the external drive you want to use for file history.
- Once the external drive is selected, you can choose how often to backup your files and how long to keep the backups. You can also choose which folders to include in the backup by clicking on the “Add a folder” button.
- When you’re done selecting your settings, click on the “Turn on” button to start the file history backup process.
- File History will now run in the background and automatically backup your files to the external drive at the intervals you selected. You can access your backups by going to the external drive and navigating to the “FileHistory” folder.
Part 1: Back-up your files in Windows 11
Depending on your preferences and the kinds of information you need to save, Windows 11 offers a variety of file backup options. These are a few of the most popular techniques.:
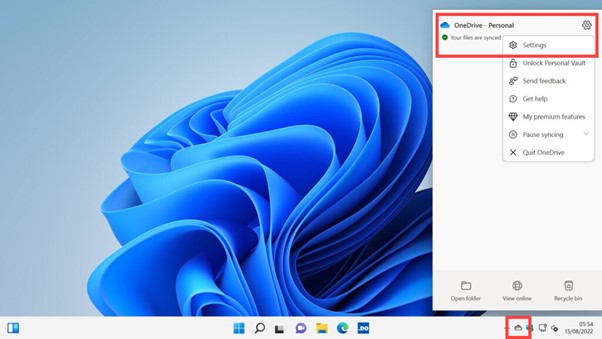
Using OneDrive:
Microsoft’s online storage platform, OneDrive, is pre-installed with Windows 11. You may utilize your OneDrive folder, which is by default accessible in the File Explorer sidebar, to store and sync files across several devices. Drag and drop files into the OneDrive folder or choose “Move to OneDrive” from the context menu of a file or folder to back them up to OneDrive.
Using File History:
You may automatically back up your data to an external device or a network location using Windows 11’s built-in File History function. Connect an external disk to your computer, then navigate to Settings > Update & Security > Backup > Add a device to configure File History. After adding a disk, you can choose which folders to backup and how frequently backups should happen.
Part 2: Restoring your files in Windows 11
Knowing how to recover your files in the case of a problem is crucial once you’ve backedup your data. Here are some of the top methods for file restoration in Windows 11:
Using OneDrive:
It’s easy to restore your data if you’ve backed them up to OneDrive by simply logging into your OneDrive account and downloading the necessary files. By selecting the OneDrive folder in the sidebar, you may also access your OneDrive files straight from File Explorer.
Using File History:
Open File Explorer and go to the folder containing the missing or damaged files to use File History to recover them. Go to the “Previous Versions” tab after selecting “Properties” from the menu when you right-click on the folder. A list of the backups that are accessible for that folder may be seen here. You may restore a backup by selecting it and then clicking “Restore.”
Using Backup and Restore (Windows 7): You may restore your complete system to a prior state if you used Backup and Restore to build a system image. Visit Control Panel > System and Security > Backup and Restore (Windows 7) > to accomplish this. System recovery or computer recovery Modern rehabilitation techniques > To restore your computer, use a system image that you already produced.
Conclusion
On Windows 11, you must backup and restore your files to prevent the loss of crucial information in the case of a system crash or unintentional deletion. You can quickly preserve and restore them when necessary by using built-in services like OneDrive, and File History.