Luminar 3 Review – Most people would know Adobe Photoshop and Lightroom. I myself use Lightroom daily to do some basic editing on my product review photos here at Craving Tech. Tweaking basic stuffs is pretty easy with the sliders that anyone can do it.
Photoshop, however? I’ve almost never touched it. It somehow feels alien and just too complicated for me. And looking at those video tutorials don’t help either.
So, when I look at how Luminar 3 photo editor can give me these powerful, easy to use, advanced tools, I was intrigued. Let’s see what it can do.
Luminar 3 by Skylum Software definitely has the Lightroom vibe with easy to use sliders to tweak your photos (supporting RAW files but also JPGs and alike). Its interface will be familiar to most people.
Luminar 3 can transform any ordinary looking photo into something worth sharing for. Though if you are not careful, the result might become too artistic or over-the-top. Thakfully, everything is adjustable and you can see any results right away without having to look at manuals.
Luminar 3 can create a library catalog of your photos though I have not tested it properly (I just don’t have enough collection of photos like professional photographers would).
Like I said before, I’m not a post processing expert and I often don’t know what I need to adjust when I look at a photo. I’m comfortable enough adjusting basic controls like Exposure, Contrast, Warmth, Saturation, Clarity and all, but that’s as expert as I can get.
Luminar 3 however, gives me smarter & more powerful options without having to look at tutorials and (hopefully) remember them for the future.
All filters are there for you to try out and you can see how they impact your photo directly.
The one tool I like most in Luminar 3 is the Accent AI 2.0. It’s basically a one-size-fits-all tool that smartly identifies a photo composition and transform a photo to be more interesting.
For example, here’s a photo taken in New Zealand using my iPhone X and Luminar 3 could make the end result pop just by sliding a single Accent AI 2.0 slider (click to enlarge):


Note that the file was in JPEG so it’s hardly “usable”, but I’m still amazed that Luminar 3 can still work with that. I realise that the end result might look like a “fake” photo, but you can adjust the strength of the post processing (and tweak the other controls manually).
The rest of these photo examples were edited using the RAW files (CR2 and RAF files).
Original photo taken by alvinjohan_ (on the left), Luminar processed on the right:


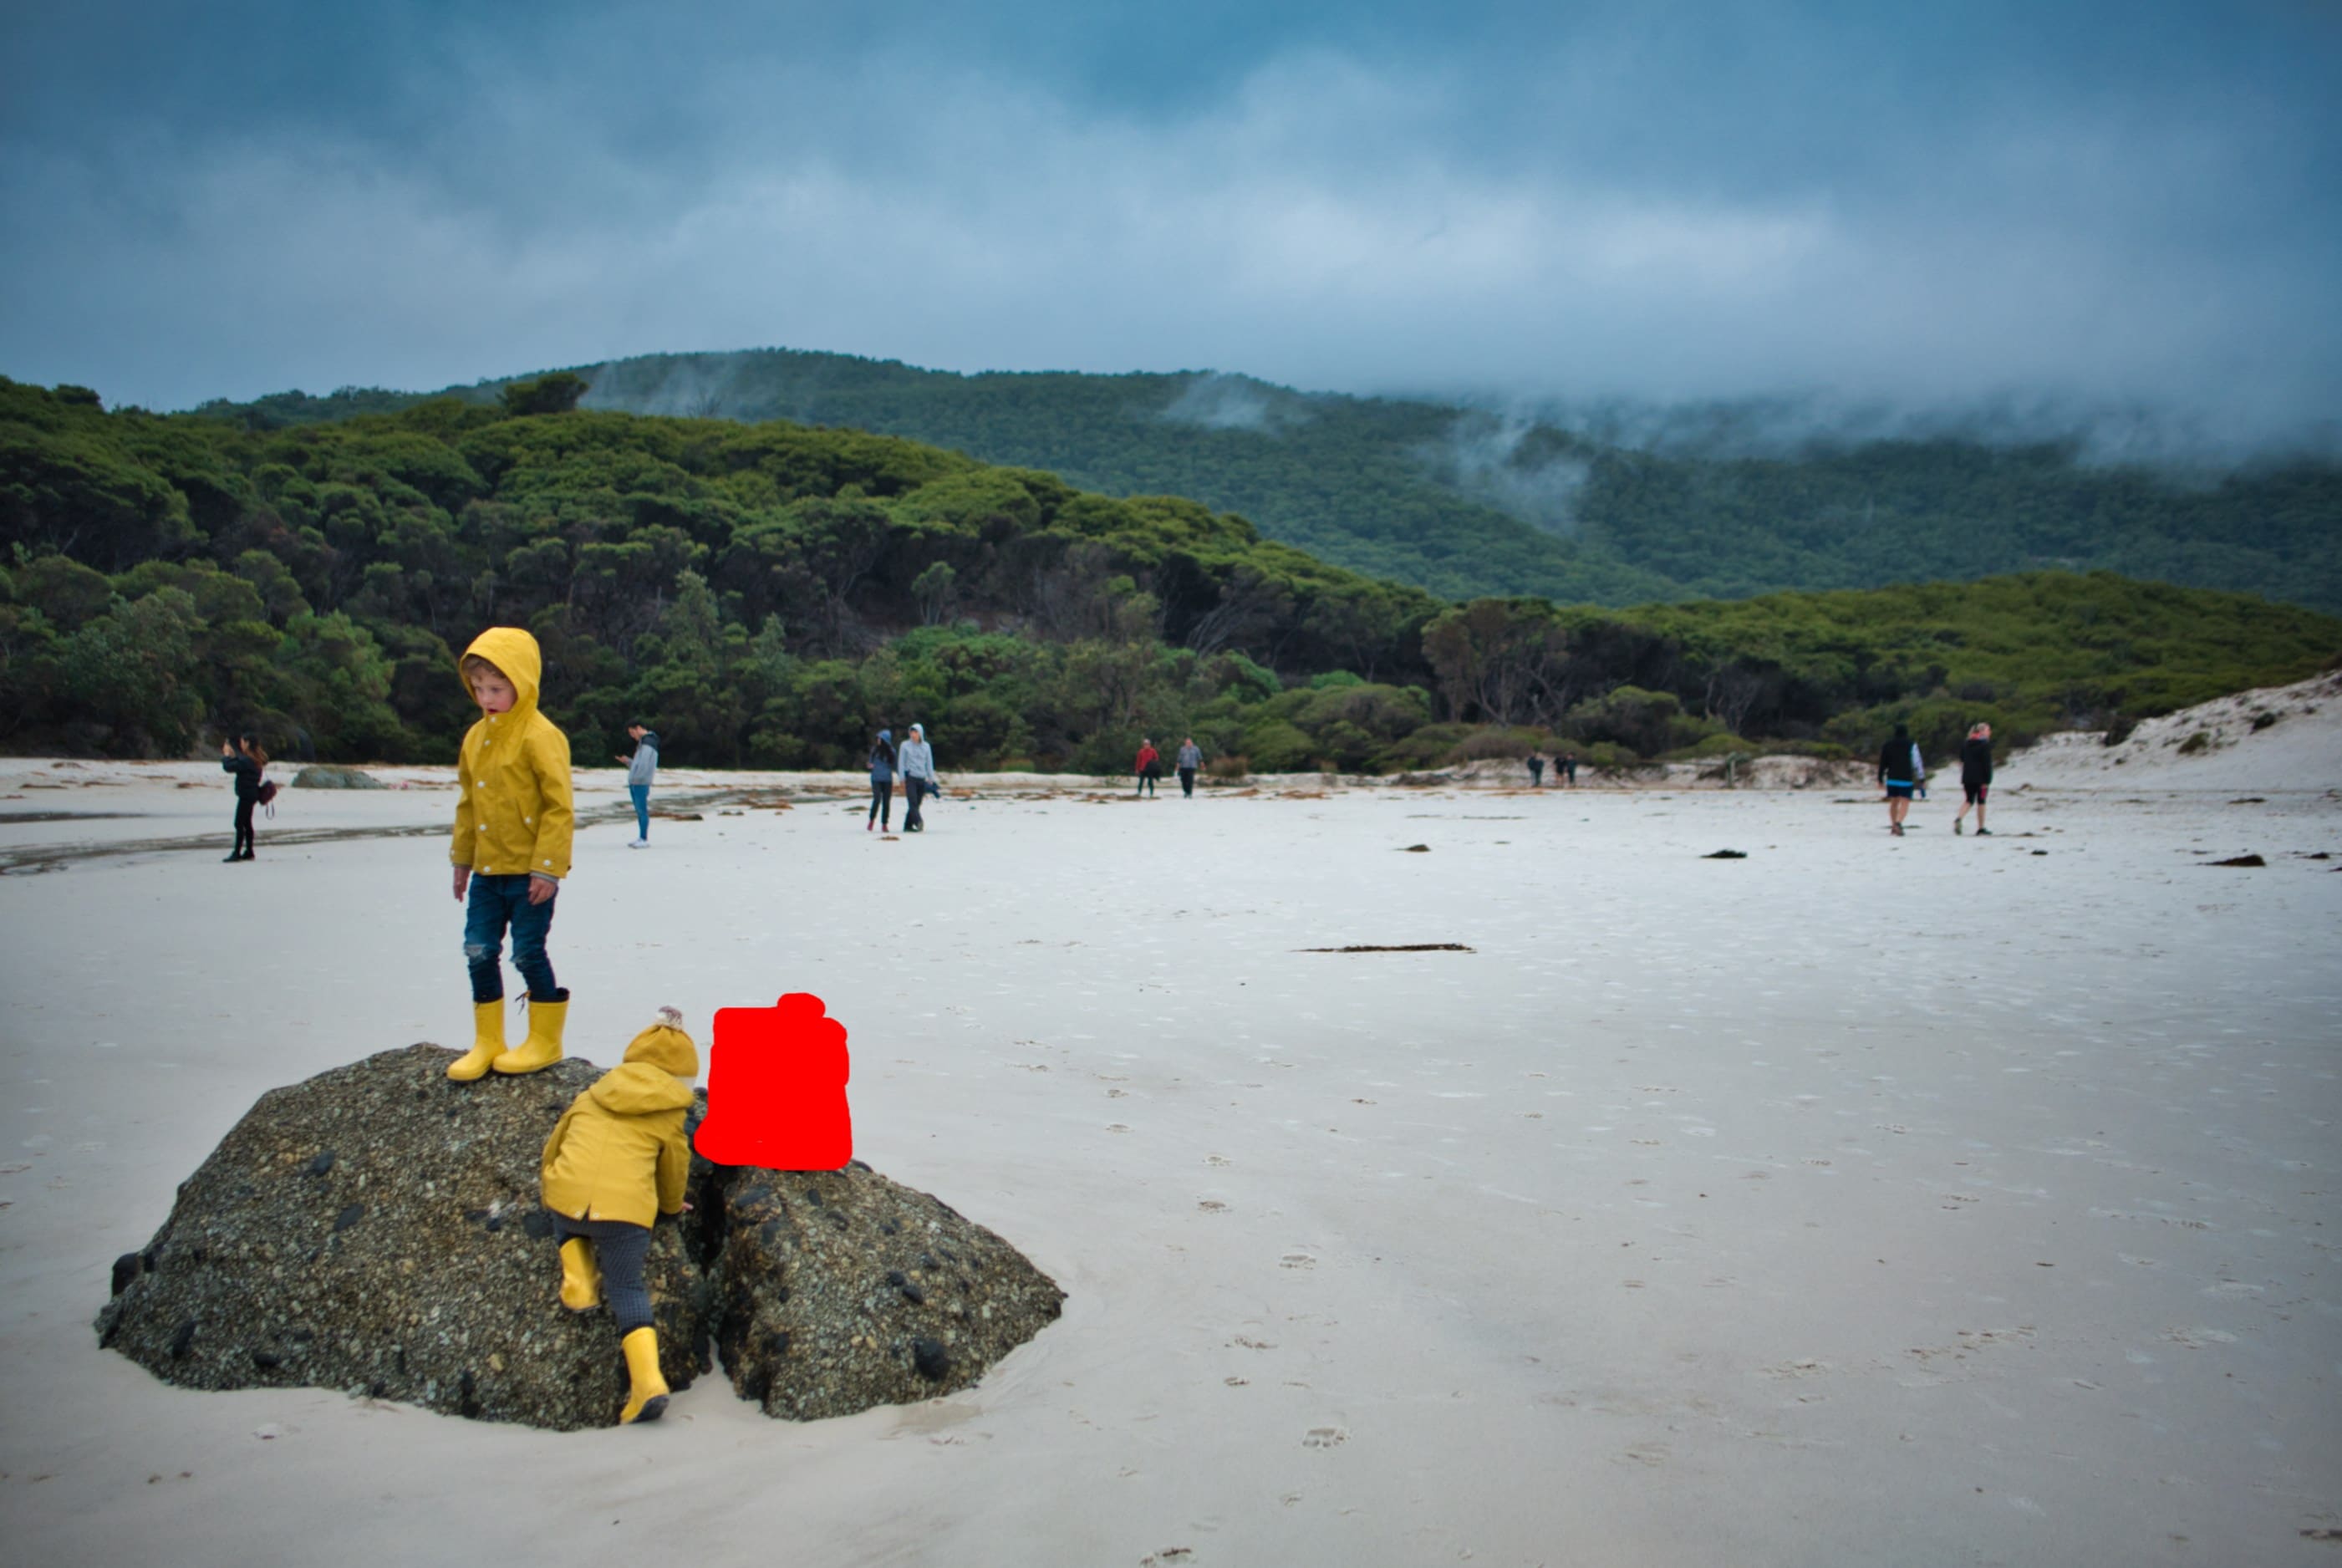
The next photo was taken by @jeremylasiman at Melbourne’s Squeaky Beach (original shot on the left). It was already a well-composed photo, but look at what can be done using the Accent AI 2.0 slider (on the right)!
I like how Luminar 3 can make the sky more interesting without losing the feel of the scene. The yellow jackets also get a boost in contrast & saturation, making them pop more on the scene.
Luminar 3 does have a feature called an AI Sky Enhancer where you can make tweaks just on the sky alone. There is also a cool Sunray filter where you can add a fake sunray and even adjust the position of the sun, yet the software smartly knows the composition of the photo. For example, in this photo at Macedon Range with trees, the tool can smartly position the fake sun behind the trees! It’s pretty cool to watch.
If I move the “sun” horizontally, it would move and always stay behind the trees in the photo, making the shot very natural.


There is also a smart eraser feature within Luminar 3 (also known as Content Aware Fill in Photoshop). In Photoshop, it would take me some time trying to work with the Lasso tool and adjust many different settings. Sure, it’s probably more powerful, but a casual user would freak out.
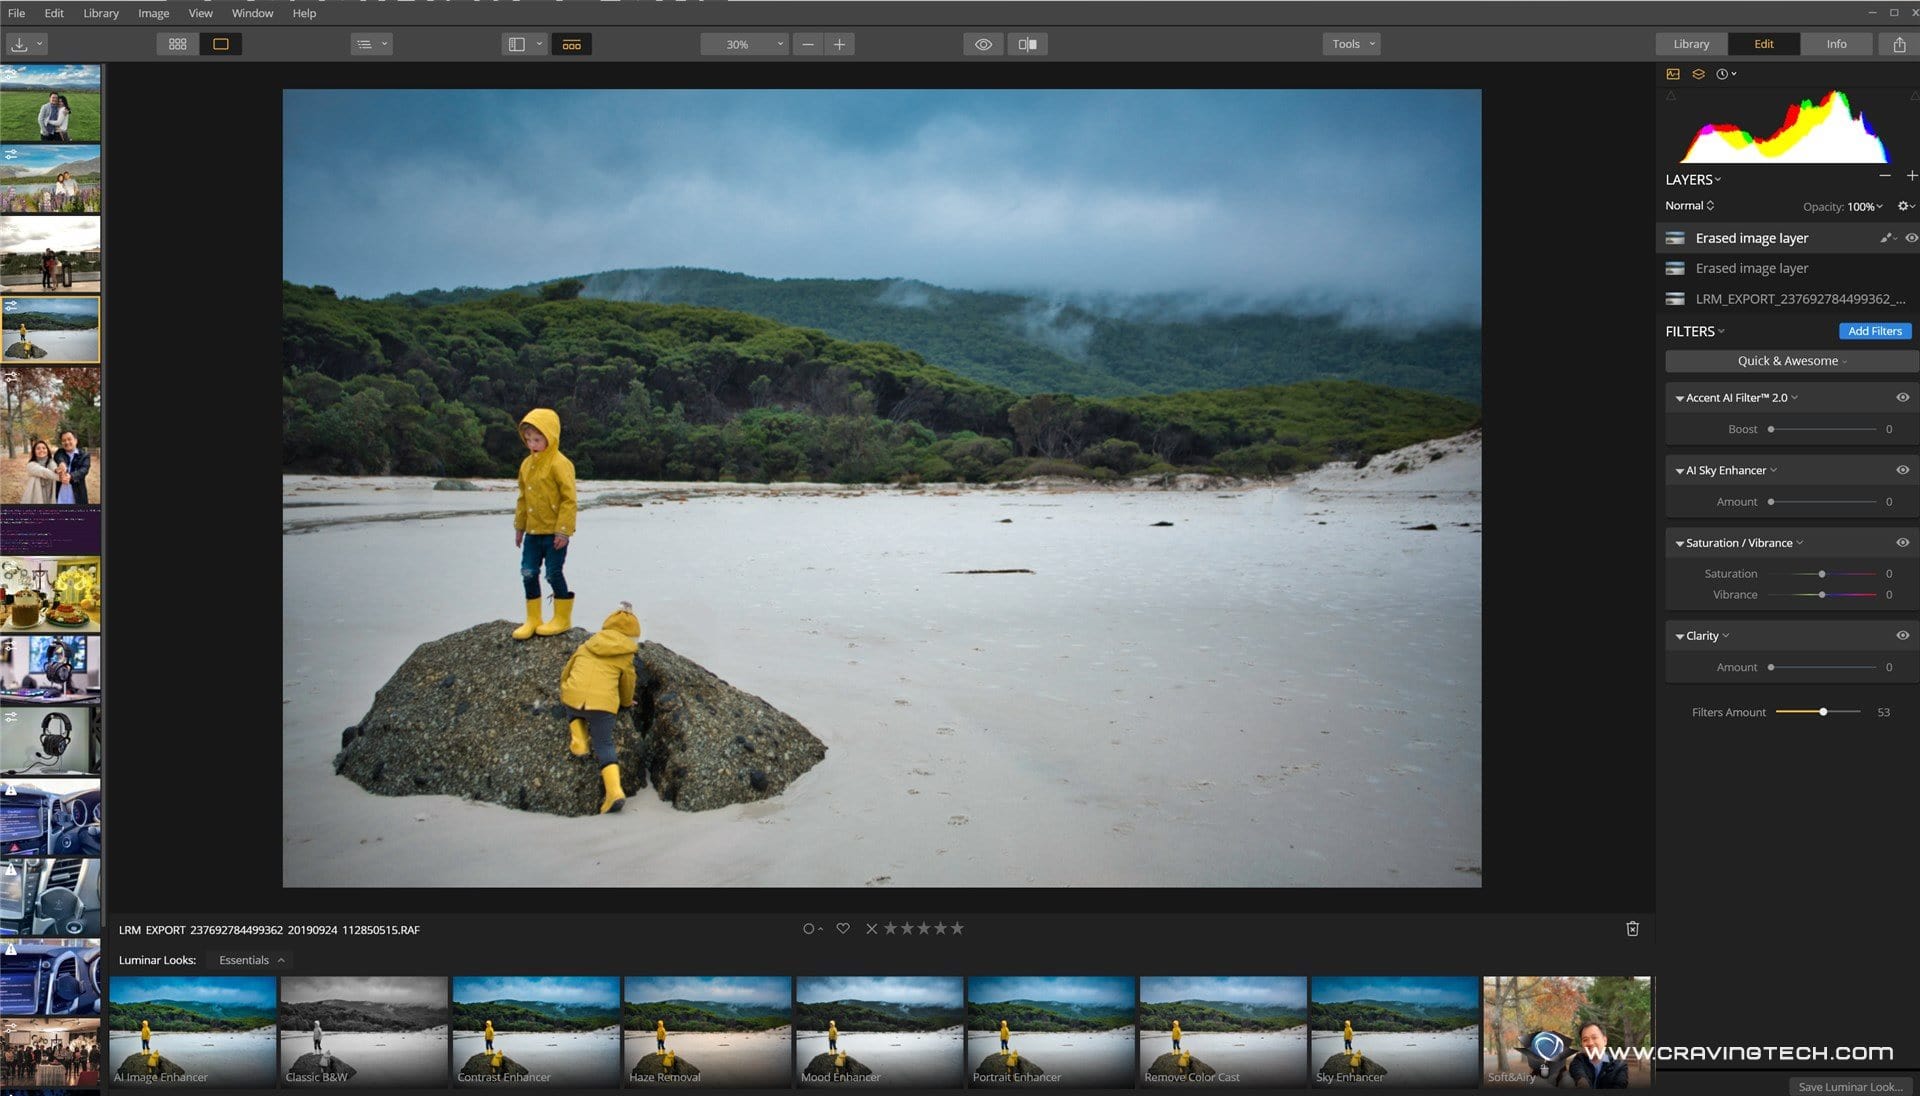
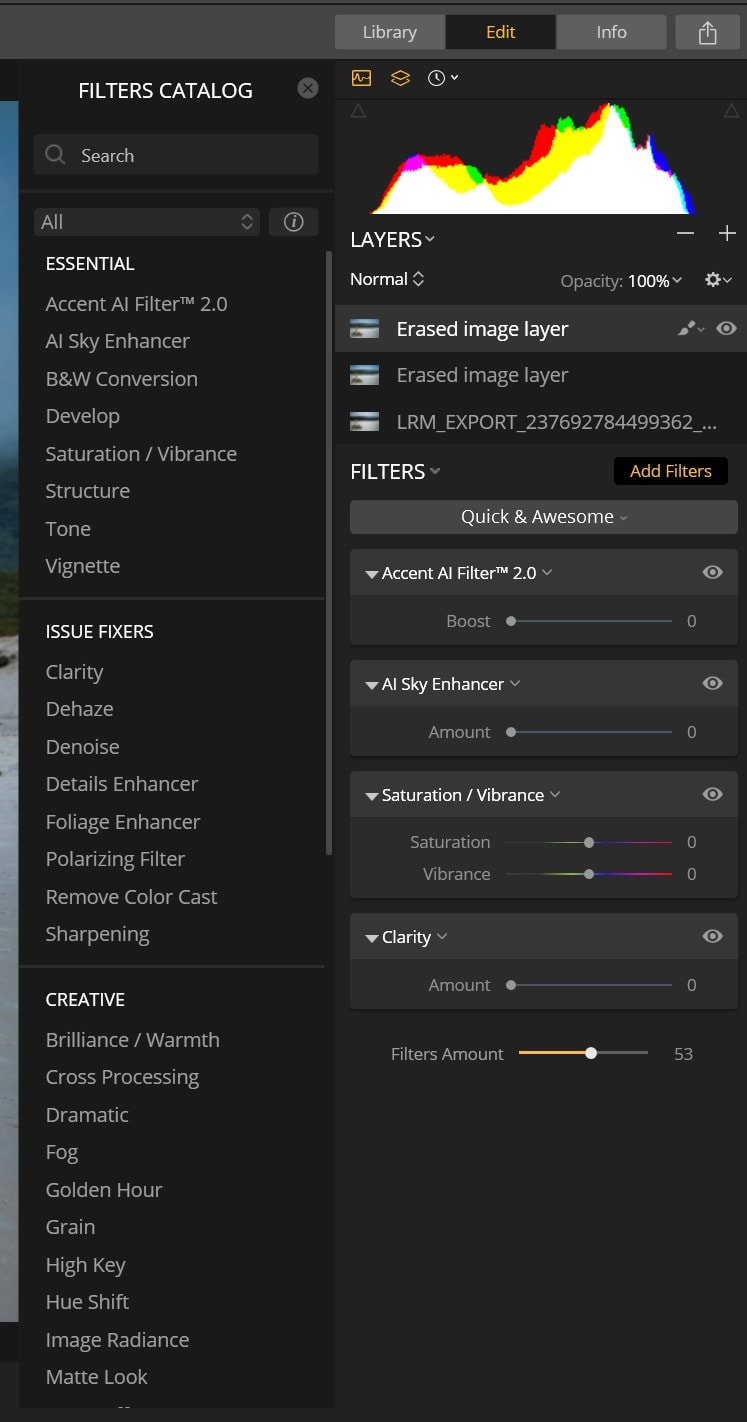
In Luminar 3, you simply use a brush with your mouse and the software will do its magic. For example, here is the photo earlier (after applying Accent AI 2.0 & AI Sky Enhancer):

Now, what if you want to remove a few things from the photo? Let’s start with that blue bag near where the kids are. Simply go to Luminar 3->Tools->Erase, and start brushing the area where you want it gone:
The result?

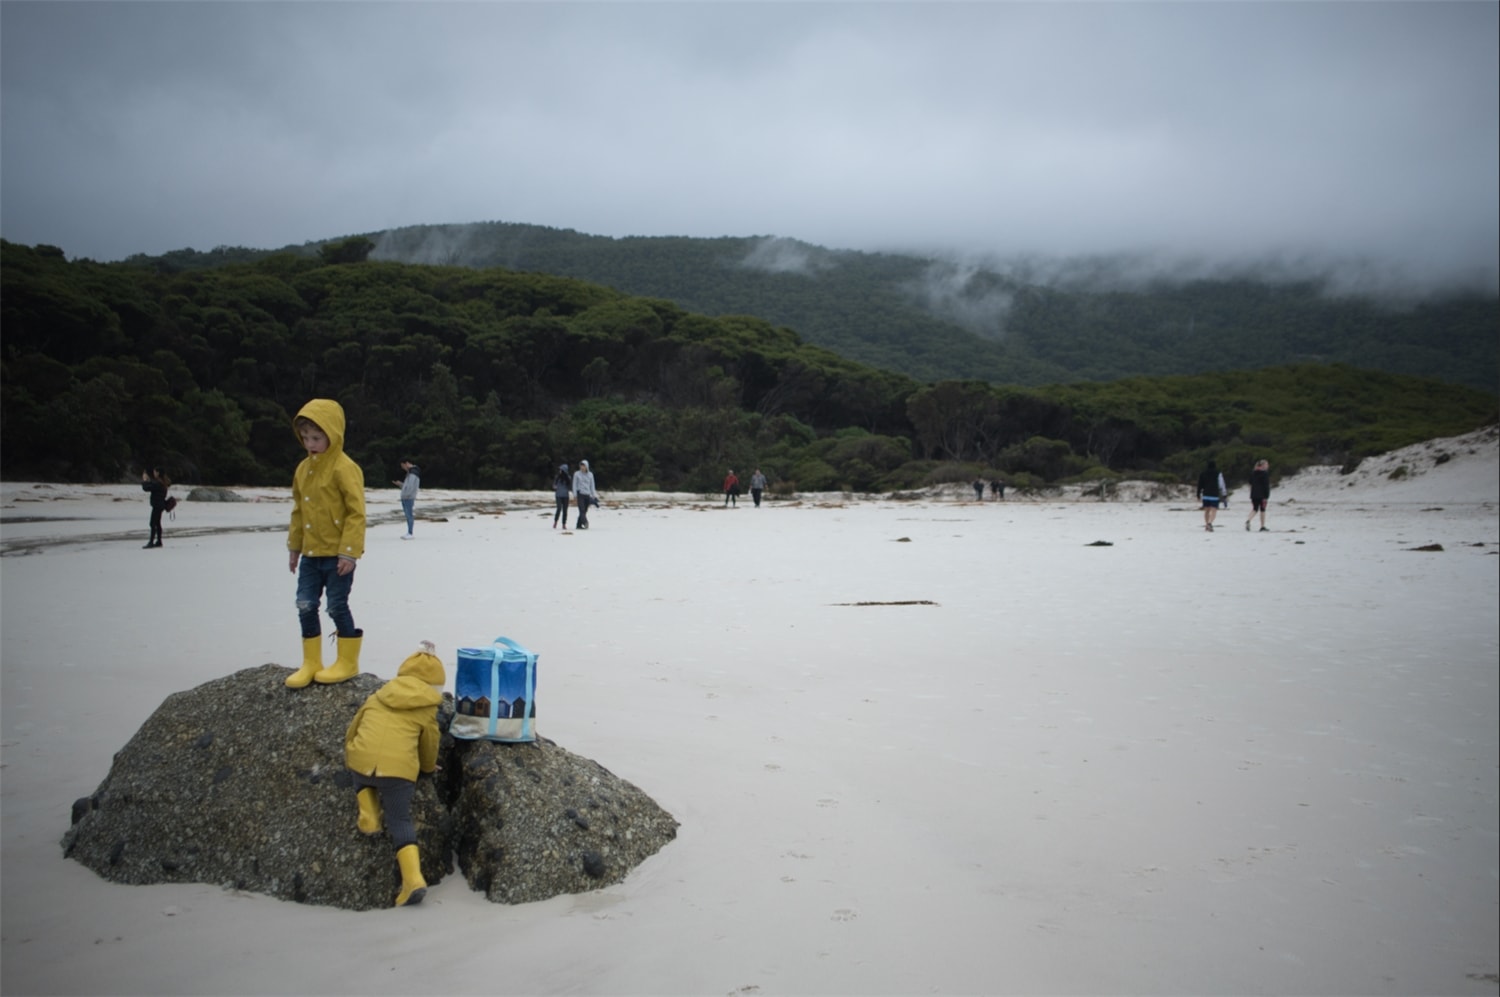
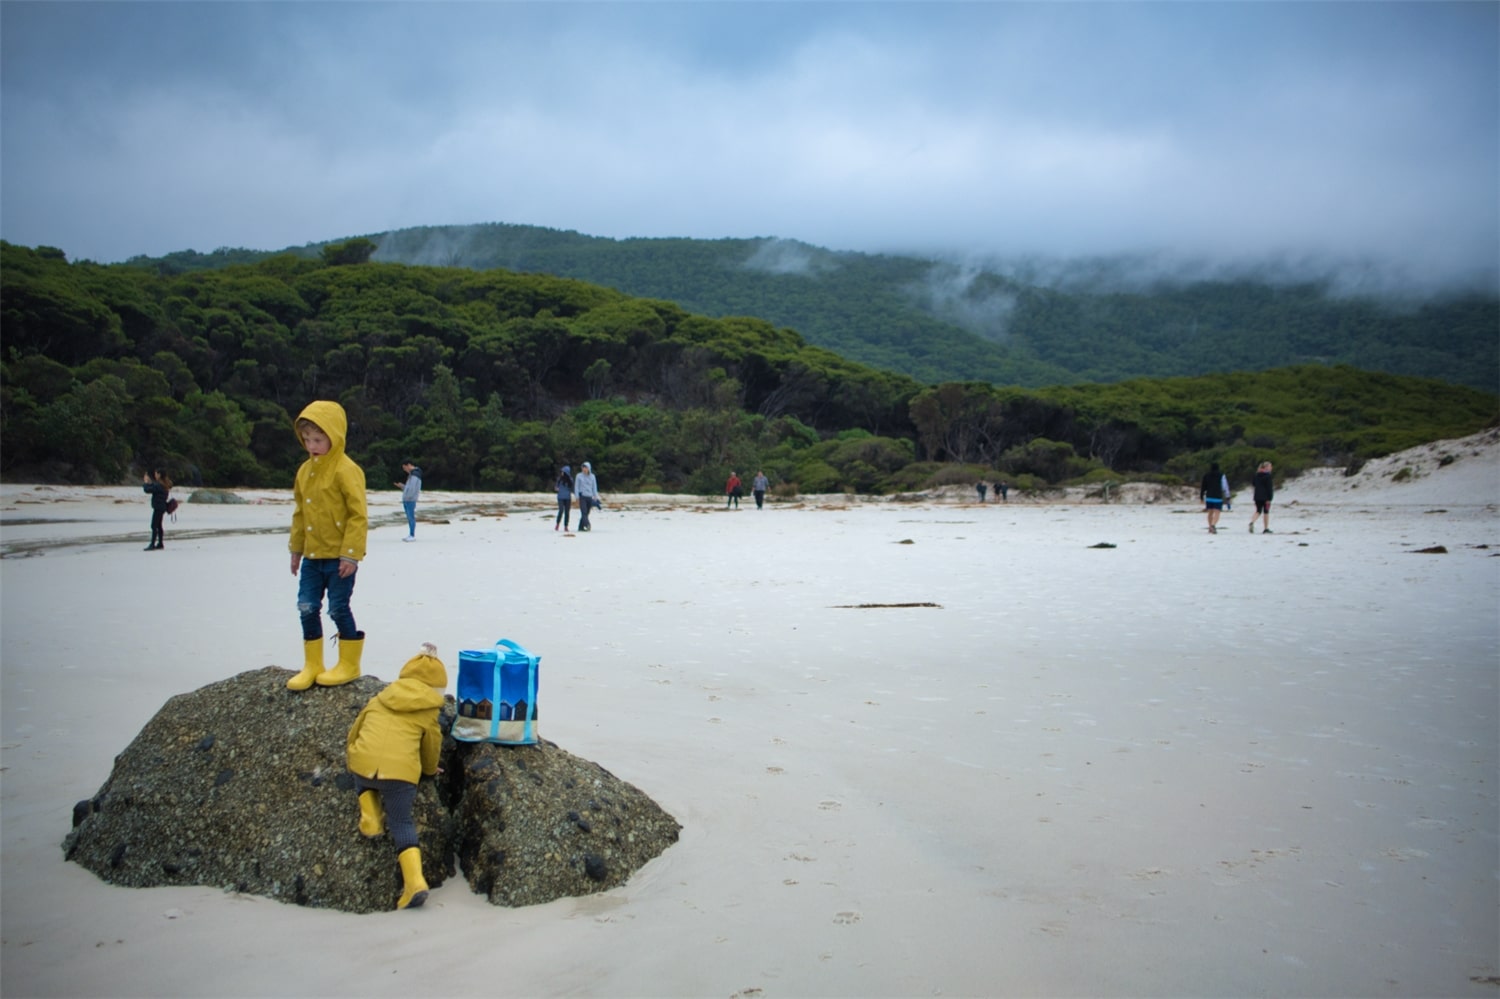
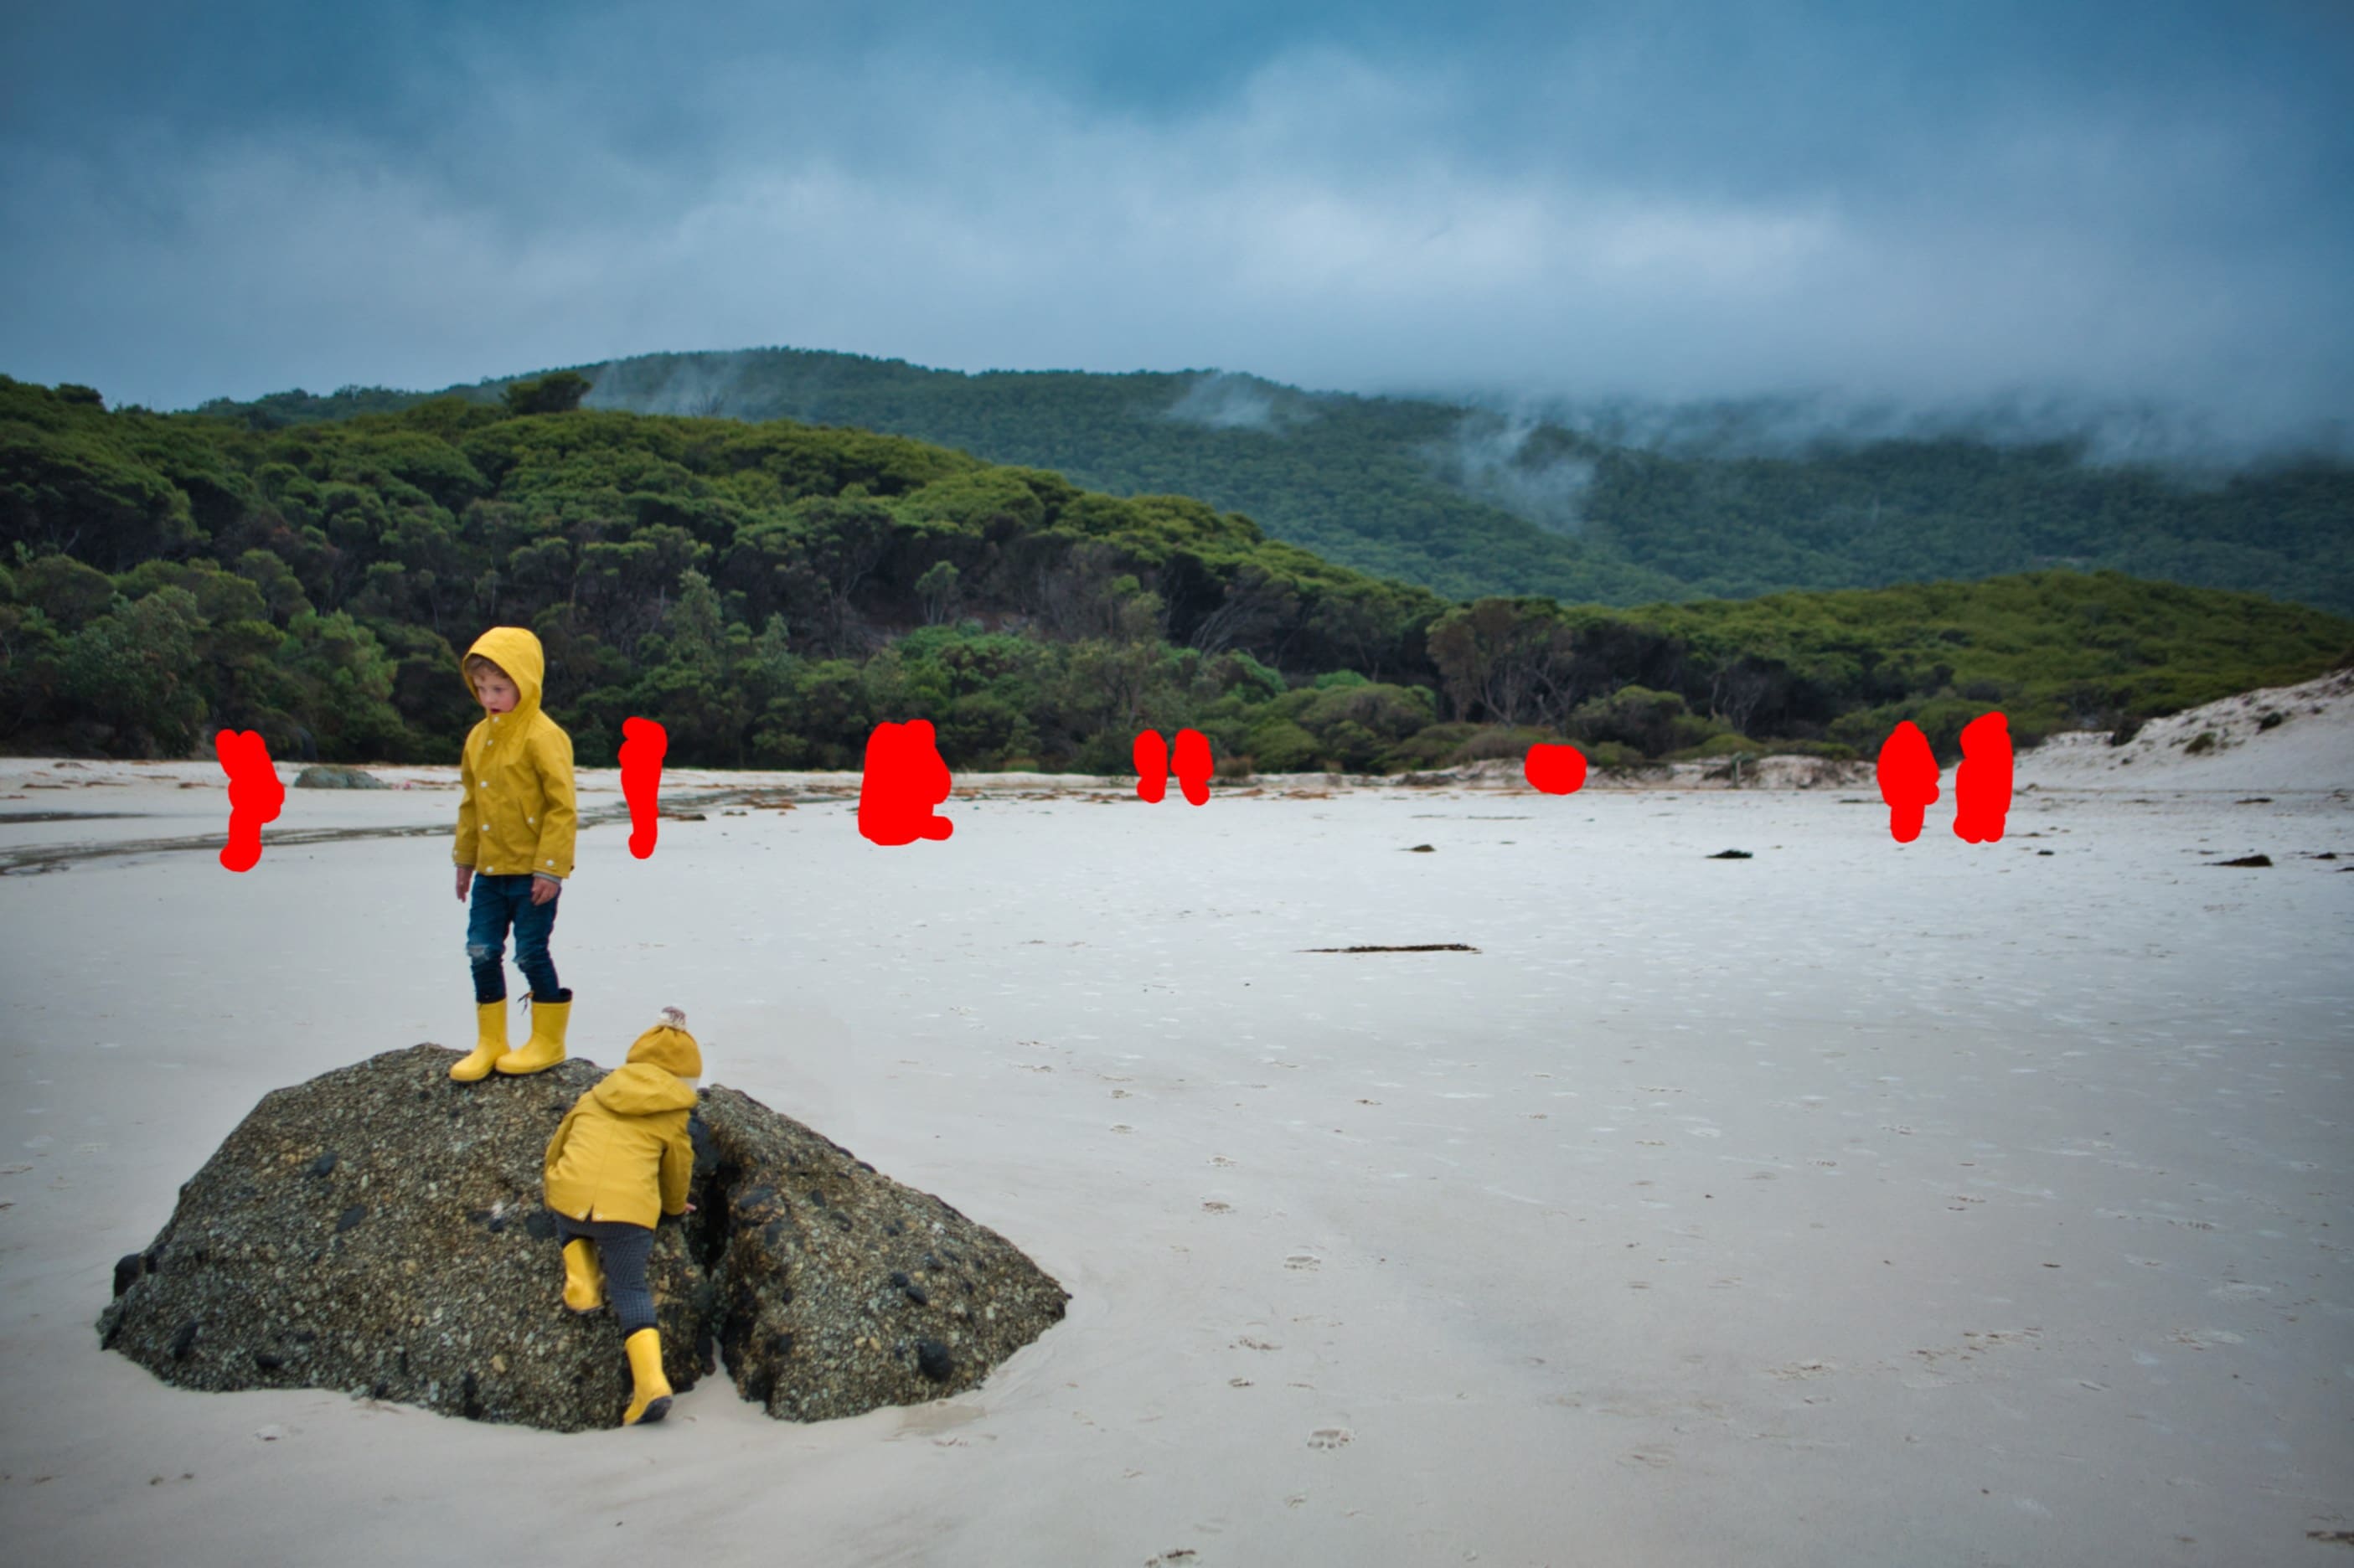
Not bad, right? And here is a more complex one. I tried removing all the other tourists on the scene and this is quite challenging for a software especilly if the background is not that simple:
The result:
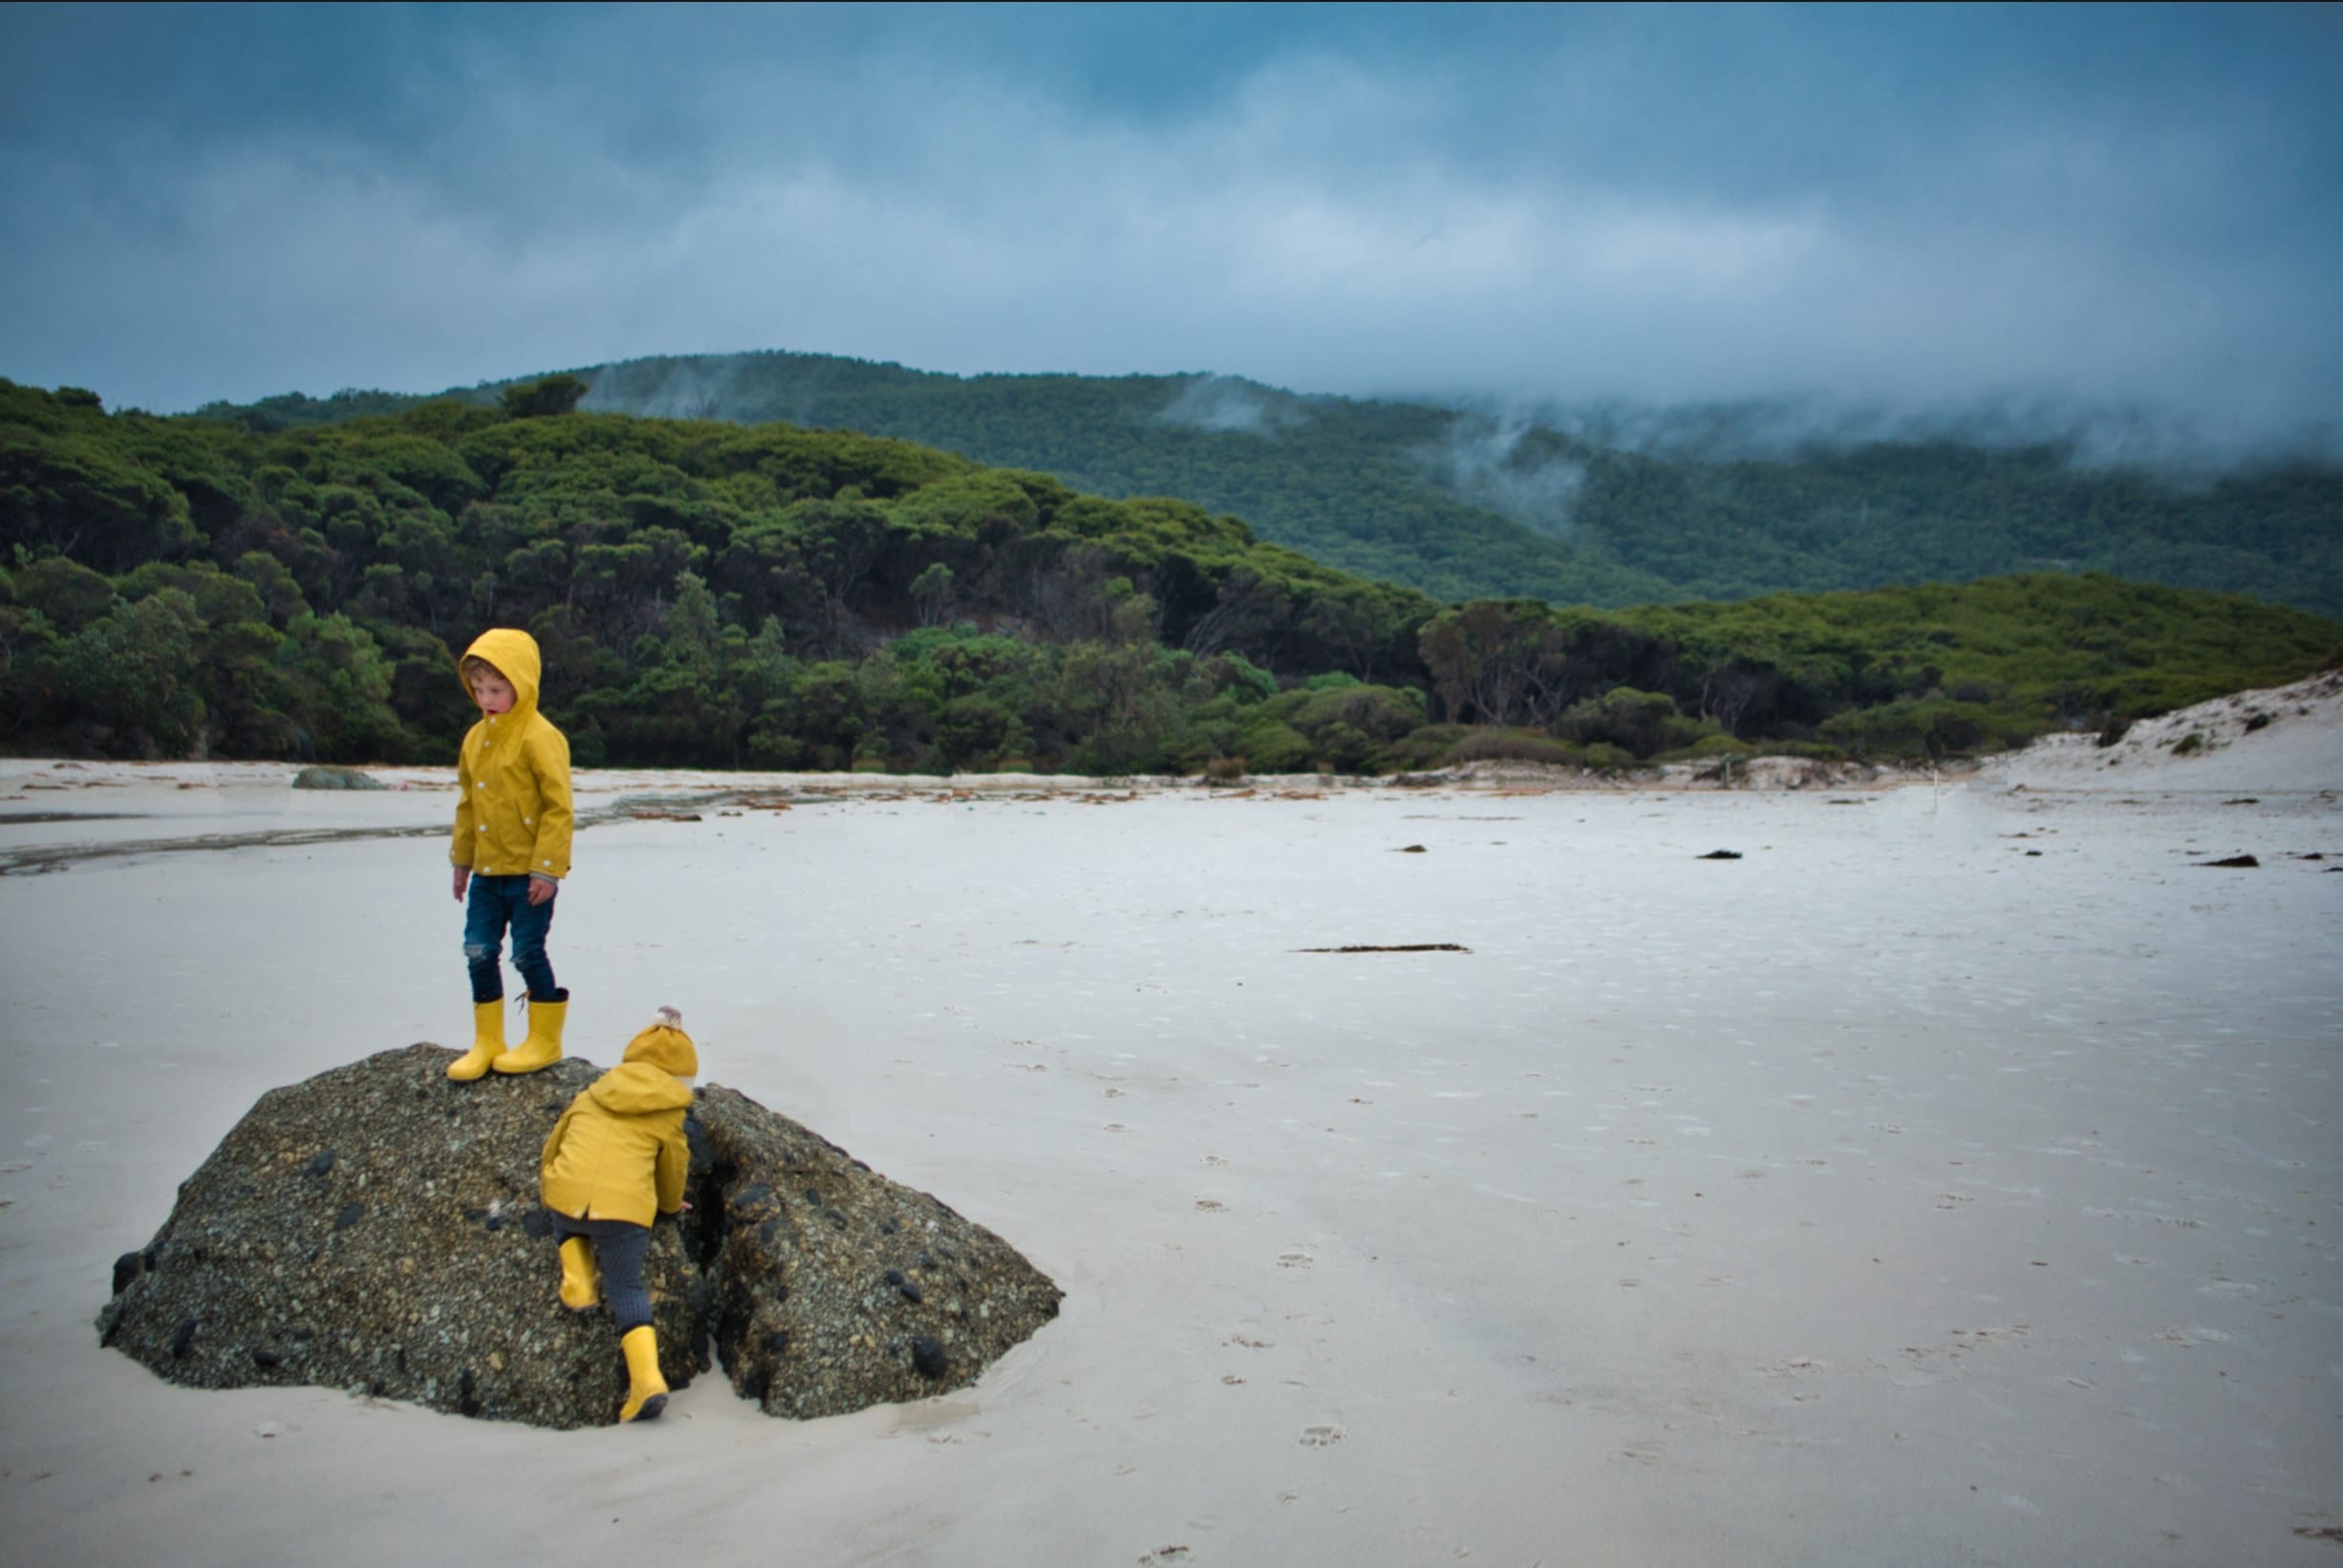
Quite an amazing result, I’d say! Now if you really look closely, sure, there’s a bit of anomaly on the far right where a couple in black apparels was walking. But it’s hardly noticeable and if I did this a few times, I might have gotten it more perfect.
But hey, you can use Luminar 3 as simple as for fixing white balance, brightness, and other basic controls.
Luminar 3 Review Conclusion
Luminar 3 feels magical and I like how I don’t need to understand how things work as the tool tweaks intelligently on the fly. Any person can now make photos better just by sliding things across and see the big difference on the screen.
There are too many features to talk about in a single review here but if you go to Luminar 3 website, you can see some of them in action yourself.
Luminar 3 also has filter presets (they call it Looks) where you can just click and choose easily, and you can also download more free and premium Looks at Luminar Marketplace.
While I’m happy with Luminar 3 capabilities, I do find that it doesn’t have the best performance even in a very fast machine I’m using – especially coming to using Lightroom every day. It’d take a few seconds to load a newly selected photo to edit. However, once the image is loaded, the editing process (i.e dragging the sliders up and down) is smoother thankfully.
Will I replace Lightroom with Luminar? I’m not sure yet. I still have to explore how to easily apply watermarking to my exported photos. And, the performance in Lightroom is just more superior that tweaking many photos feels smoother and faster.
However, if I ever want to tweak a photo more than just adjusting exposures and make it better, I’d definitely fire up Luminar 3, no questions asked. And with the upcoming Luminar 4 in the corner, I’m quite excited to see what else is coming. AI Skin & Portrait Enhancer sound promising! I’m also hoping they can improve the performance of the software.
Luminar 3 is a once-off purchase at $99 – cheaper compared to Lightroom’s monthly subscription and there is also a 30 day trial for you to give it a go.
Disclosure: Luminar 3 review license was supplied for reviewing but all opinions are mine and not paid