 The high end gaming mouse nowadays have been dominated mainly by Razer. So when I heard people talking about a SteelSeries gaming mouse in a forum, I was making a funny expression on my face. I’ve never heard of SteelSeries before and never see a product of it here in Australia retail shops.
Looking at how many people were arguing in the forum whether the Razer DeathAdder mouse is actually better than the SteelSeries Ikari mouse, I decided to give the SteelSeries Ikari Laser mouse a try (I was using the Razer DeathAdder before).
So how does it compete with the other gaming mouse in the market?
SteelSeries Specifications
Specifications for SteelSeries Ikari Laser (from the official product page)
- Samples per second: 40.000
- Inches per second: 50
- Counts per inch: 1 – 3.200 (one CPI Steps)
- Acceleration: 20 G
- Sensor data path: True 16 bit
- Lift distance: 1,8 mm (0,07 inch)
- Buttons: 5
- Cord: 2 m / 6,5 ft (braided to improve durability)
- Polling: 1000 Hz
- Gold-plated USB connector
- Measurements: 130 x 83 x 36 mm / 5,1 x 3,3 x 1,4 in
- CPI high/low indicator
- SteelSeries FreeMove Technology
- Large pressure points that reduce friction for optimized glide
- Driverless, plug-and-play feature for LAN gamers
- Operating systems: Win XP/Vista/Win 2000/Win 98/Win ME/Mac OS
SteelSeries Ikari Laser Mouse Packaging
Before we go into more details about the mouse, let’s have a look at what’s inside the box.
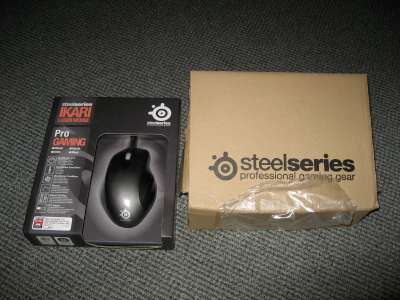
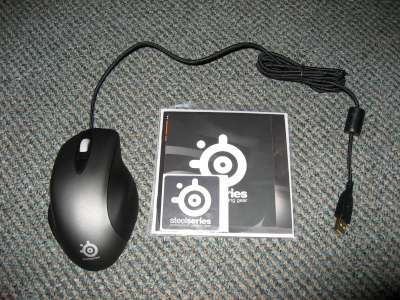
The packaging contains:
- The Ikari mouse itself
- A SteelSeries sticker (I still haven’t found out where to stick it to yet)
- A CD case containing the software (more on this later)
- A short manual on how to use software and the mouse
- A few small marketing materials
CPI vs DPI
Before I go any further with the review, I need to make something clear first. SteelSeries has been using the terms CPI (Counts Per Inch) rather than DPI (Dots Per Inch). What’s the difference between CPI and DPI? Well they are practically the same thing but the term DPI is supposed to be used in the printing industry and shouldn’t be used to measure a mouse movement. So if you are used to seeing the term DPI on mouse specifications, just think of CPI as DPI everytime I mention CPI on this post.
If you really want to know more about what CPI actually is and how it affects the accuracy of a mouse, have a look at this article from the SteelSeries development team.
SteelSeries Ikari Laser Mouse look and feel
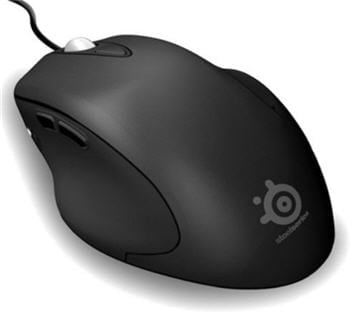
The mouse looks huge and kinda unique at first glance.
Designed for Comfort
Upon a closer look, you’ll find that the mouse is highly designed for comfort. You will be amazed at how all your fingers (even your pinky) are fit nicely on its contour. The mouse is definitely designed for the right handed, though.
From the SteelSeries product info page:
The SteelSeries Ikari mice are the result of 15 months extensive research of ergonomics, technology, shape, motion, hand grip and play styles by gamers
I’d definitely give a big nod to the statement above as I can really feel the comfort even when my hand uses this mouse for a long time (I spend like a whole day in front of my computer playing games, browsing, chatting, and blogging).
Overall look of the mouse
The mouse doesn’t have any glowing surface or other gimmicks (apart from the cool SteelSeries logo at the bottom). It’s simple yet attractive enough to sit on my computer desk.
The Buttons
The Ikari mouse has several buttons: the left, middle (scroll wheel), right, and also the low-hi CPI toggle button (can also be used to set the CPI manually). The clicking noise is a little bit too noisy for me but it gives a real sense of a click, if you know what I mean.
LED indicators and LCD screen
The Ikari Laser mouse has 2 indicators to let you know whether it’s currently on the low or high CPI settings. You toggle through the low and high CPI by pressing the lo-hi CPI toggle button I mentioned before (which is located straight under the scroll wheel for a quicker access).
The LCD is located at the bottom of the mouse and will display the profile that you are currently in. More on the profile will be explained later on this post. Very rarely you’ll have to see the screen which is probably the reason why the LCD is put at the bottom of the mouse.
SteelSeries Ikari Laser Mouse Features
The Ikari Laser Mouse is “driverless”
Yup that’s right. Just plug-and-play the mouse and you can use it using the Windows’ default mouse driver. It will not degrade the quality of the mouse movement or reducing its capacity. This is crucial if you have to bring your own mouse to a LAN party or to a different computer. Carrying a driver CD around is so old in the past.
The Ikari Laser Mouse saves your profile & settings inside it.
Yes, INSIDE the mouse. You set the profile, macros, and other features using the included SteelSeries software but the settings will be saved to the mouse. Once saved, you can confirm it by looking at the LCD screen below the mouse. This is another plus if you want to bring your mouse to a gaming competition since the mouse will retain its settings no matter where you plug it to.
You can have different profile for different games. For example, I set a profile for playing CS Source and switch to it when I wanted to play that game.
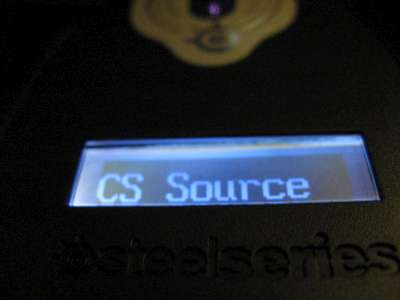
You can only save 1 profile on the mouse however, which is a pity. To switch between profiles, you have to use the software to load the other profile and then use the “Apply to Mouse” button to “inject” it to the mouse.
Ikari Laser Mouse buttons are programmable (using macros)
This is why there are 2 extra buttons on the mouse. You can program the buttons to any combination of keystrokes and mouse clicks using the software. Since you can have different profile for different needs, you can re-program the buttons on different profile.
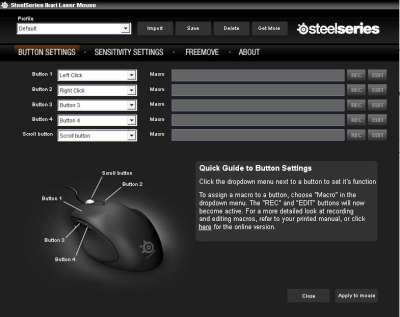
So for example you can program Button 4 for a quick throw of a grenade and a quick switch back to your main weapon in CS:Source easily by recording: a keyboard #4 press, a left mouse click, and a keyboard #2 press. It’s a great feature although I think it’ll slowly make you a lazy gamer :)
Or for example I can program my Button 4 in Warhammer Online to detaunt my target (using a Detaunt skill on my keyboard #9) and then running away (on my keyboard #0). This will let me to escape quicker and *hopefully* unharmed.
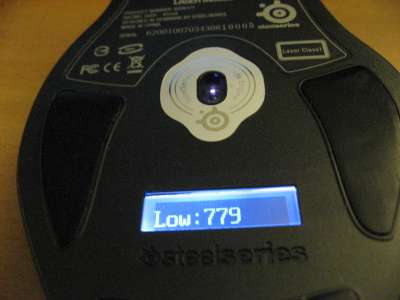
Ikari Laser Mouse lets you adjust the CPI by 1 increment
As if the 2 settings (the low and high) are not enough, you can even change the CPI setting manually up to 1 increment. You do this by pressing and holding the lo-hi-CPI toggle button and then using the scroll wheel to quickly change the CPI.
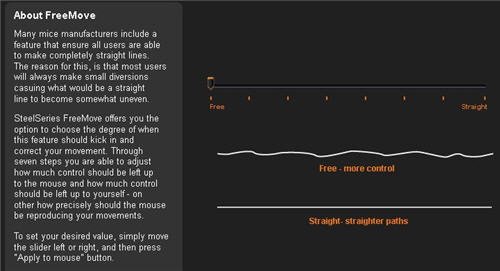
Ikari Laser Mouse’s Freemove
Some mouse manufacturers design the mouse so that it corrects some movements. This may be good for designing works but bad for gaming. In gaming, you want to be as accurate as possible. SteelSeries allows you to set the amount of the correction you want on the mouse (and yes, you can also save different settings on different profile).
Ikari Laser Mouse Problems/Issues
I was wondering whether there could be any problems with the profile being saved inside the mouse constantly (when switching between profiles). It reminds me of the big warning sign that we usually get when we try to flash our phone’s ROM. That pessimistic feeling came true when I stumbled into a problem once (I was trying to save a profile into the mouse). The mouse went to a sort of a freeze; the cursor is no longer moving and any button clicks did nothing anymore.
Looking at the LCD at the bottom of the mouse, it was obvious something went wrong:
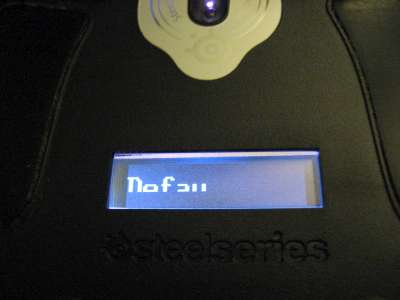
I panicked a bit because restarting the computer didn’t seem to do any different. Thankfully by re-plugging the mouse back into the USB slot cured the problem. To avoid this problem from happening to you, try to avoid pressing that “Apply to mouse” button too quickly (which was what I did *whoops*).
Conclusion
The SteelSeries Ikari Laser mouse is a great mouse overall. It looks sleek and elegant. However, it’s not just the looks that counts. It’s very well designed for comfort but also for gaming (the reason why SteelSeries tested the mouse with professional gamers). I never experienced any tearing when moving the mouse quickly during my gaming session. It’s accurate and supports a very high CPI for high sensitivity style gamers.
The Ikari Laser mouse is also the best gaming mouse that you should carry to a gaming competition because:
- It can save your low and high CPI settings inside the mouse.
- You can adjust CPI settings on the fly which is crucial if you don’t know what kind of horrible lie in the computer you are playing at.
- The Freemove feature allows you to accurately point your mouse where ever you want it to.
- You don’t need to carry a driver CD around since the mouse is driverless.
I now use the SteelSeries Ikari Laser mouse and put my Razer DeathAdder on my cupboard, ready to be sold away :) I find that the Ikari mouse is much more comfortable than my DeathAdder.
This is the first time I’ve ever tried a product from SteelSeries and looking at the quality that the mouse has, I’ll certainly have no problem in trying their other products and also recommend them to my friends.
Pros:
– Ergonomically designed for comfort and long hours
– Accurate, as tested by professional gamers around the world
– Supports a very high CPI (or DPI, if you are still being stubborn with the term)
– “Driverless”. Simply plug and play.
– Profile is saved on the mouse so you can use the same settings on any computer.
– Freemove. Move the cursor wherever you want it to without being “smartly” corrected.
Cons:
– Specialized for right-handed people.
– Can only save 1 profile on the mouse.
– Quite pricey for a mouse.
– Doesn’t include a mouse pad (okay, I’m just being too greedy!)




Comments are closed.